In this Filezilla tutorial, you will learn how to configure Filezilla Ftp client to connect to the Ftp server and manage all files in it.
What is Filezilla?
Filezilla is free and open-source software that can help you transfer large files easily and quickly. Most hosts have certain restrictions when uploading files via PHP or scripts. However, these limits do not apply to FTP uploads, so the Filezilla client can be a very good and powerful tool for programmers.
Filezilla FTP client is very user-friendly and easy to use, so it is the most popular FTP client. It also supports multiple operating systems such as Windows, Linux, Mac OS X, BSD, and many other operating systems. The software is available in multiple languages and has features such as Site Manager, transfer queries, bookmarks.
What do you need
Before you begin, you need:
- Filezilla client can be downloaded here.
- FTP login information.
Step 1 – FTP information
You need FTP access information, which can be found in your Email or create a new or reset Ftp account in your hosting control panel.
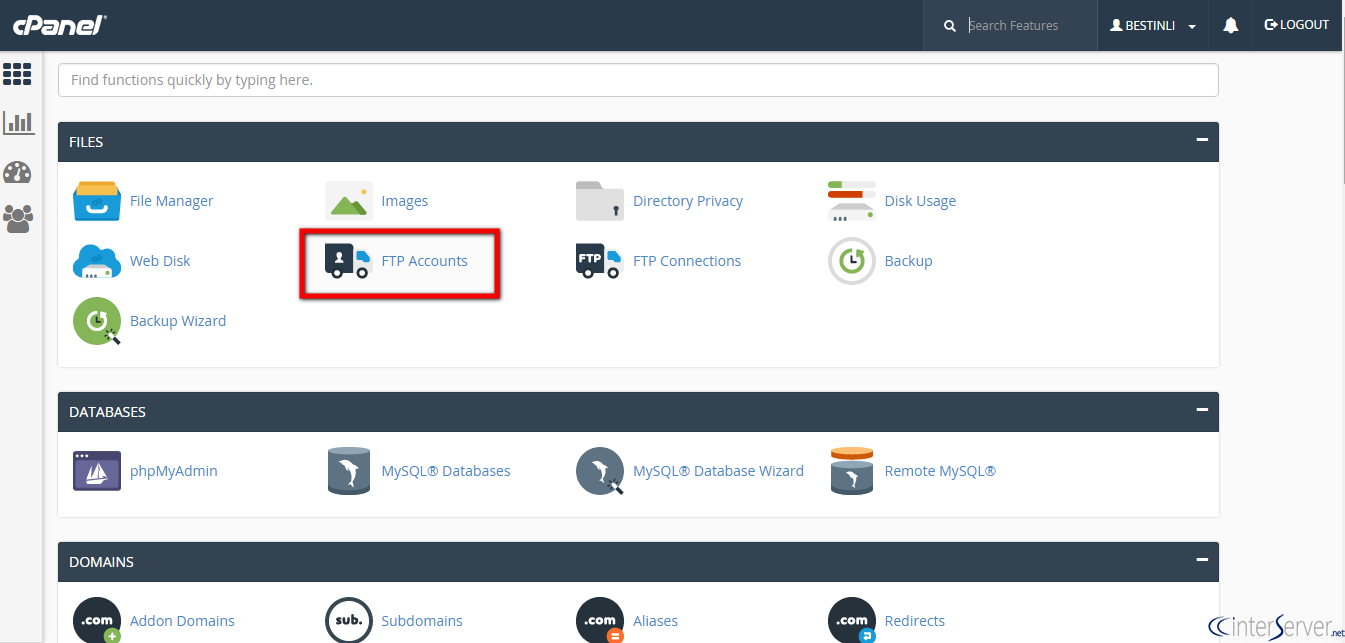
There you will find enough FileZilla access information, including FTP Hostname, FTP Username, FTP Password, and FTP Port.
Step 2 – Access the Site Manager in the Filezilla Client
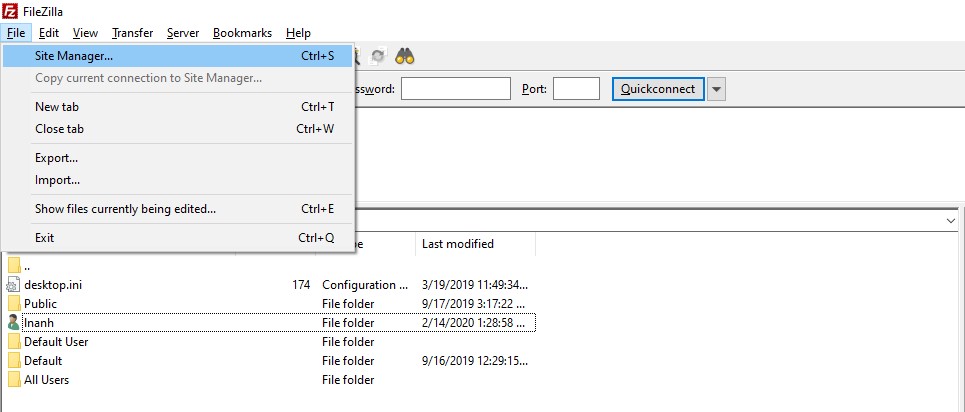
To add a site to the FileZilla client, you need to open FileZilla and access the Site Manager section. Site Manager can be accessed by pressing CTRL + S on Windows OS and On MAC you can press CMD + S ) in the Filezilla client or you can find the icon on the left in FileZilla
Step 3 – Add a site to Site Manager
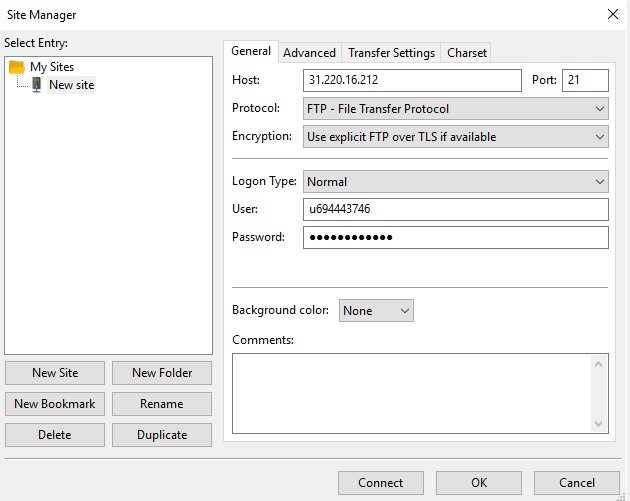
In step 3 of this Filezilla manual, we will create Site Manager and configure FTP information into Site Manager. This will help FileZilla client remember this site and you don’t have to fill in your login details every time you need to log in to the FTP server. To do this, click the ” New Site ” button in the Site Manager and fill in the missing information in the image below.
- ” Host ” – you can find this information from your hosting provider, but in many situations, you can type ftp.yourdomain.com as the hostname.
- ” Port ” – Port FTP server, the default port of FTP is 21, however, this field is not required.
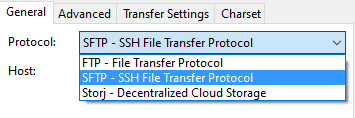
- ” Protocol ” – protocol for transferring files between networks. Choose FTP – File Transfer Protocol.
- FTP – FTP stands for “File Transfer Protocol”. It is an Internet protocol specifically designed to establish a connection between an Internet server (or computer), so that users can transfer files (or download files) to their computers or upload files from their computers to the server. (computer).
- SFTP – SFTP stands for “Secure File Transfer Protocol”. Secure file transfer protocols ensure that data is transferred securely using a personal connection stream. It is the standard file transfer using the SSH2 protocol. SFTP servers use port 22 and FTP over SSL / TLS (implicit mode) using default port 990.
- ” Encryption ” – choose how the data is encrypted. We recommend using only use plain FTP (insecure), because the methods require you to create additional certificates and other configurations. If you want to connect to the server when using another encryption protocol, contact your hosting provider for further instructions.
- ” Logon Type ” – the login type to use, as appropriate:
- Anonymous: You cannot add additional usernames and passwords. In this case, the username must always be “Anonymous”.
- Normal: You must enter the username and, if necessary, enter the password.
- Ask for the password : FileZilla will ask you for the password when logging in while logging in, remember the password of that session.
- Interactive: FileZilla asks for a password and can ask again each time to connect for the password, and asks again for every new connection to the server.
- Account: Select this in the Account field in the bookmark settings. This account type will only be for FTP, SFTP does not support it.
- User: The FTP user you use to connect.
- Password: Password of FTP user
You can specify the Logon Type, which can be set to Normal and fill in the username and password.
IMPORTANT! If the domain name has not been pointed to a host, the part of the domain that is the hostname ftp.yourdomain.comwill not work. So point the domain to hosting first or use an IP server, which is also in the FTP configuration section that you can collect in Step 1
Step 4 – Connect to the FTP server
Once you have entered all the necessary information, press the ” Connect ” and ” OK ” buttons to connect to the server. Before doing so, double-check if your password and information are correct.
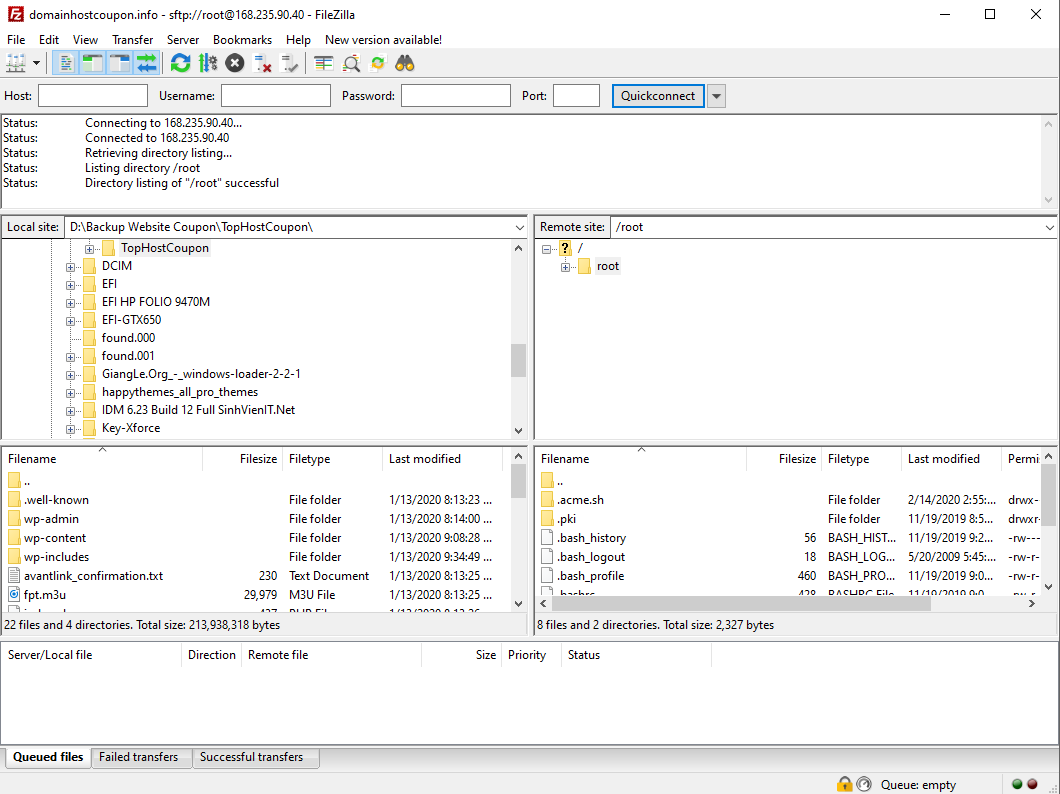
If the connection is successful, you will see the folder listed in the FTP server. You have entered the correct information, but the connection still failed or was denied / Just asked for support from the hosting provider.
To continue, press the OK button. You should tick the box Always trust certificate in future sessions. This way, you won’t have to go through this step every time you want to make an FTP connection to the server via the FileZilla client.
If successful, you will see the directory listing on your FTP server. Do you have the correct details, but the connection is still denied? You just need to contact your hosting provider for further instructions. Or scroll down to the bottom for instructions on fixing basic errors. Searching for Google error codes can also help you correct them.
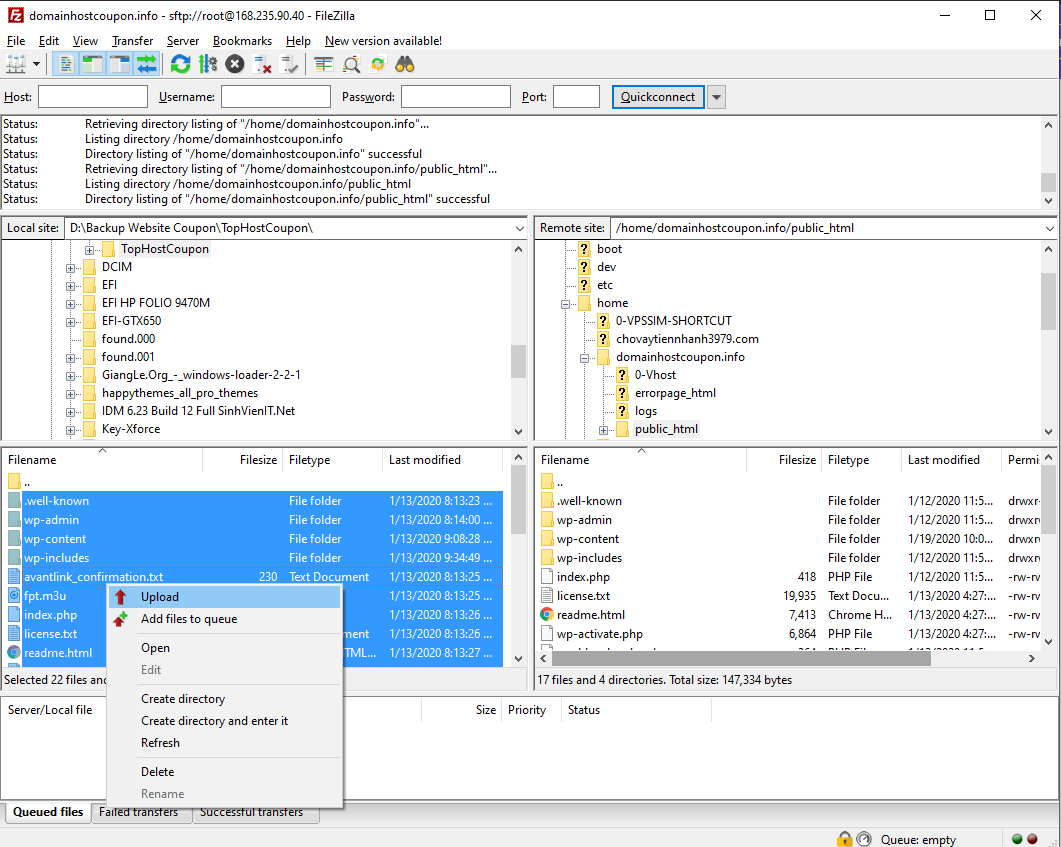
Step 5: Upload the file to the server using FileZilla
Once you’re connected, locate and drag and drop data from the left side of the software (that is, the files on your computer) to the right (that is, to the server’s directory), the files must be placed in the mail. item public_html on the server:
Similarly, you can upload compressed files via FTP, by dragging from left to right. If it is a large file that you cannot extract via File Manager.
Fix common errors
If you get an error 530 Login Authentication failedin the FileZilla client, that means either the FTP username or password is incorrect. Try resetting the FTP password and updating the new password. Finally, double-check that the FTP username is correct.
If the FileZilla client returns an error Connection established, initializing TLS…but you don’t see the connection happening, go to File -> Site Manager and try changing Encryption to Only use plain FTP (insecure).
Epilogue
Congratulations, you have successfully configured the FileZilla client and connected to your FTP server, you can download, upload and manage all files from one Filezilla client site. If you have questions, problems, or any questions about this FileZilla tutorial, feel free to leave a comment below! Also, if you have ideas, have tips to recommend, do not be afraid to share with everyone in the comments.