Cloudflare is one of the famous free CDN service providers to speed up your website.
Do you want to use Cloudflare CDN for your WordPress website but don’t know how to install it?
Many people think that Cloudflare is very difficult to install. Therefore, in this article, I will guide you to set up Cloudflare in WordPress.
It will help improve website speed a lot!

What is Cloudflare CDN?
Cloudflare is a very popular free CDN provider these days. This is a large network of global CDN servers.
They automatically cache static files and deliver content quickly.
In addition to CDN service, Cloudflare is also an anti-DDOS service trusted by many large companies around the world.
The tool monitors all traffic to the web, and blocks suspicious traffic before it reaches the server.
Cloudflare offers a basic free plan suitable for small and medium websites.
There are also paid plans starting at $20 per month.
Cloudflare is a very good choice for small businesses looking for a free CDN.
However, if you want to use the full features of Cloudflare, you will need the Business plan which costs $200/month.

How to install Cloudflare on a WordPress website?
This is quite simple, consisting of two main steps:
- You can use the Cloudflare single-click option in cPanel
Install it manually on the Cloudflare website. - The first method is the easiest way to activate Cloudflare CDN on WordPress.
Method 1: Use the Cloudflare single-click option in cPanel
As I said above, cPanel is currently the number one popular hosting management control panel today, hosting providers often provide the option to help you set up Cloudflare CDN more easily in WordPress right in the middle of the web. admin dashboard.
These providers have the Cloudflare app built into cPanel and we can activate it with just a few clicks.
This option works similarly for most other integrated hosting providers.
For reference, I will show the setup process on cPanel right below.
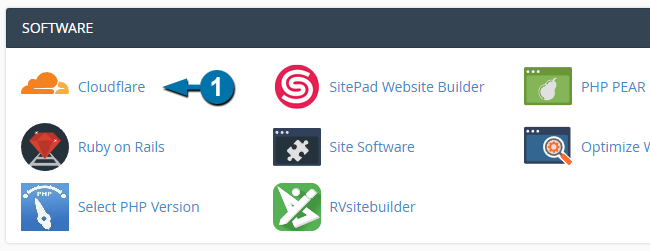
To get started, log into cPanel and navigate to the ‘Software’ section.
Then click on the ‘Cloudflare’ icon
To enable a Cloudflare CDN (free) for your website, simply click on the ‘Set Up’ button to continue.
You will then see a popup asking us to create a Cloudflare account or connect to an existing one.
Next, a message stating that the CDN is activated will appear. Once done, the Cloudflare CDN will be live on the website.
Method 2: Set up Cloudflare manually on the website
Use this method, it only takes a few more minutes.
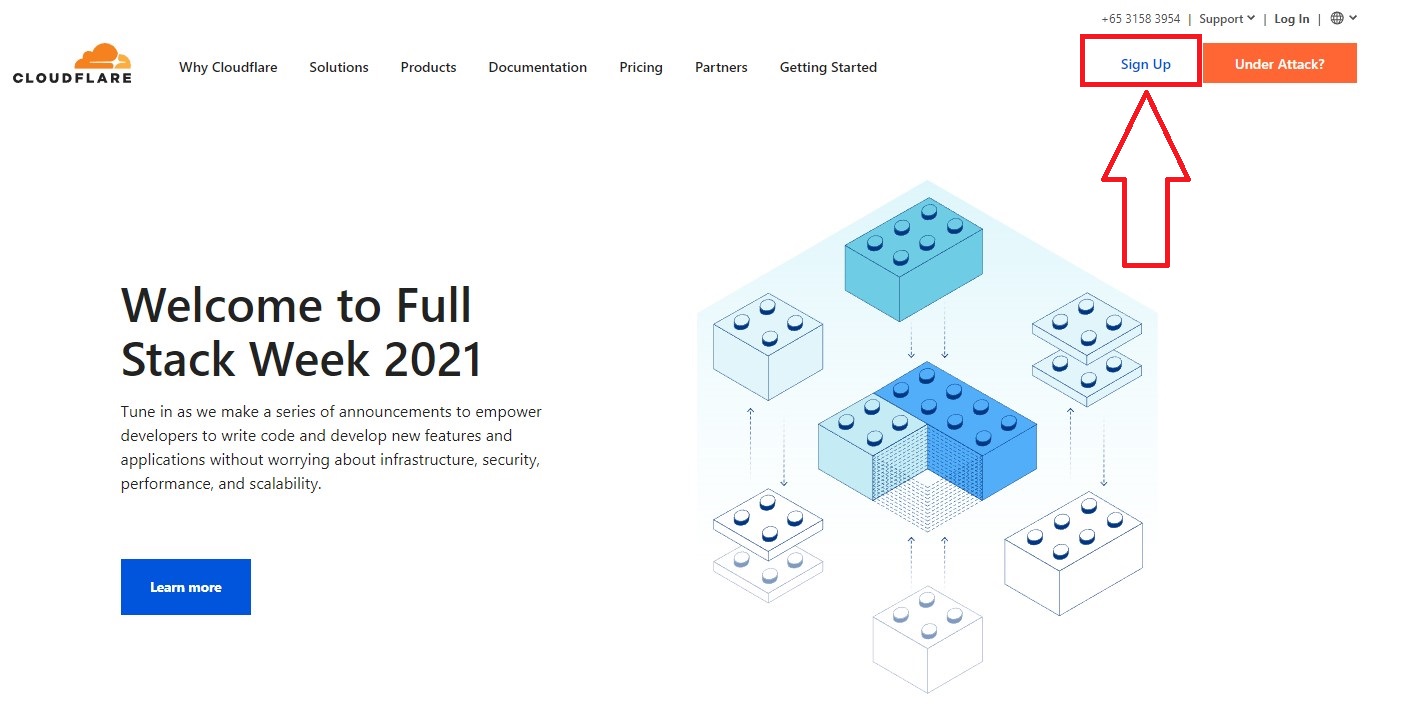
To get started, you need to visit Cloudflare.com and click on the ‘Sign Up’ button.
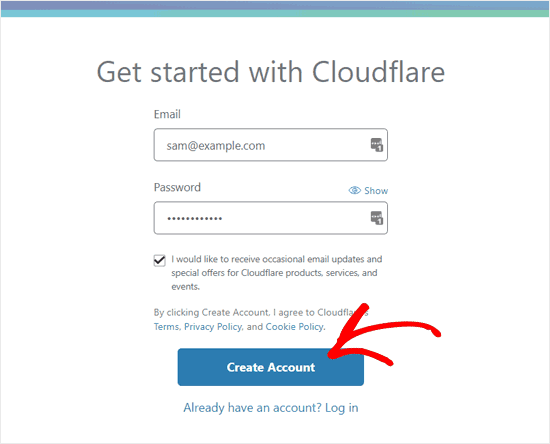
On the next page, enter your email address and password to create a Cloudflare account, then click ‘Create Account.
Next, you need to enter your website URL.

On the screen that appears, you will be asked to select packages.
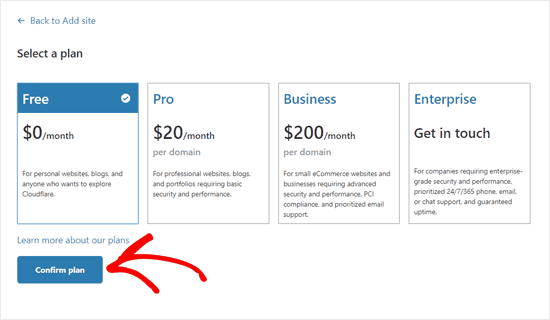
Of course, we will choose the FREE plan, if you are eligible, choose the paid plans with more features.
After that, Cloudflare will show us a list of all DNS records that the system finds.
This will include subdomains.
DNS records passed through Cloudflare will have an orange cloud icon.
The rest of the DNS records that don’t go through Cloudflare will have a gray cloud icon.
You need to review the list to make sure that your main domain is active on Cloudflare with the orange icon.

When verifying DNS records, please click the Continue option at the bottom.
In the next and final step, Cloudflare will ask you to update the nameservers.
You will be asked to change your nameservers and point them to Cloudflare’s nameservers.
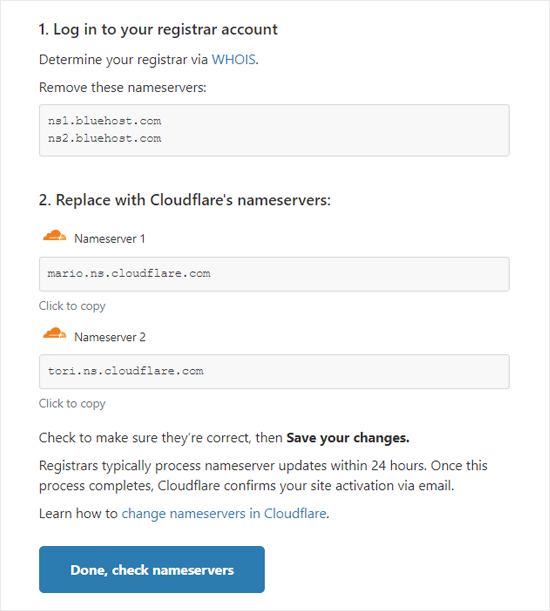
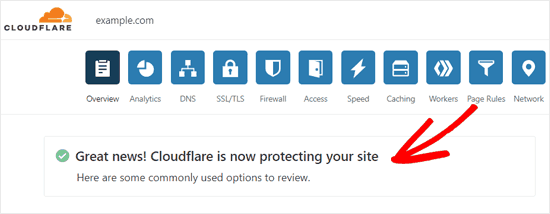
Done! It will now take a few minutes to update the nameserver and activate Cloudflare.
Once activated, you will see a success message on your Cloudflare dashboard.
So I showed you how to set up Cloudflare on WordPress. If you have any questions or need help, you can leave a comment below this article.