LAMP or LAMP Stack is a group of 3 different software Apache, MySQL, and PHP used on the Linux operating system. The term LAMP was formed by combining the first letters of the words Linux, Apache, MySQL, and PHP.
This article will guide you on how to install LAMP on Ubuntu 16.04. We will need 4 steps to install Lamp on Ubuntu.
If you are in need of a VPS running Ubuntu, you can register for free at Amazon AWS Free Tier or you can use a special Vultr discount code from KingHostCoupon to have $ 100 to your account when you sign up. The program of giving $100 credit to new customers at Vultr is still ongoing at the time of this writing.
Note: To be able to follow the instructions in the lesson, you need to know how to use the terminal command line program on Ubuntu.
Step 1: Update Package
Before installing Ubuntu, you need to update the Ubuntu software package to the latest version with this command:
sudo apt-get update
Step 2: Install Apache Web server
Use the following command to install Apache Web server:
sudo apt-get install apache2
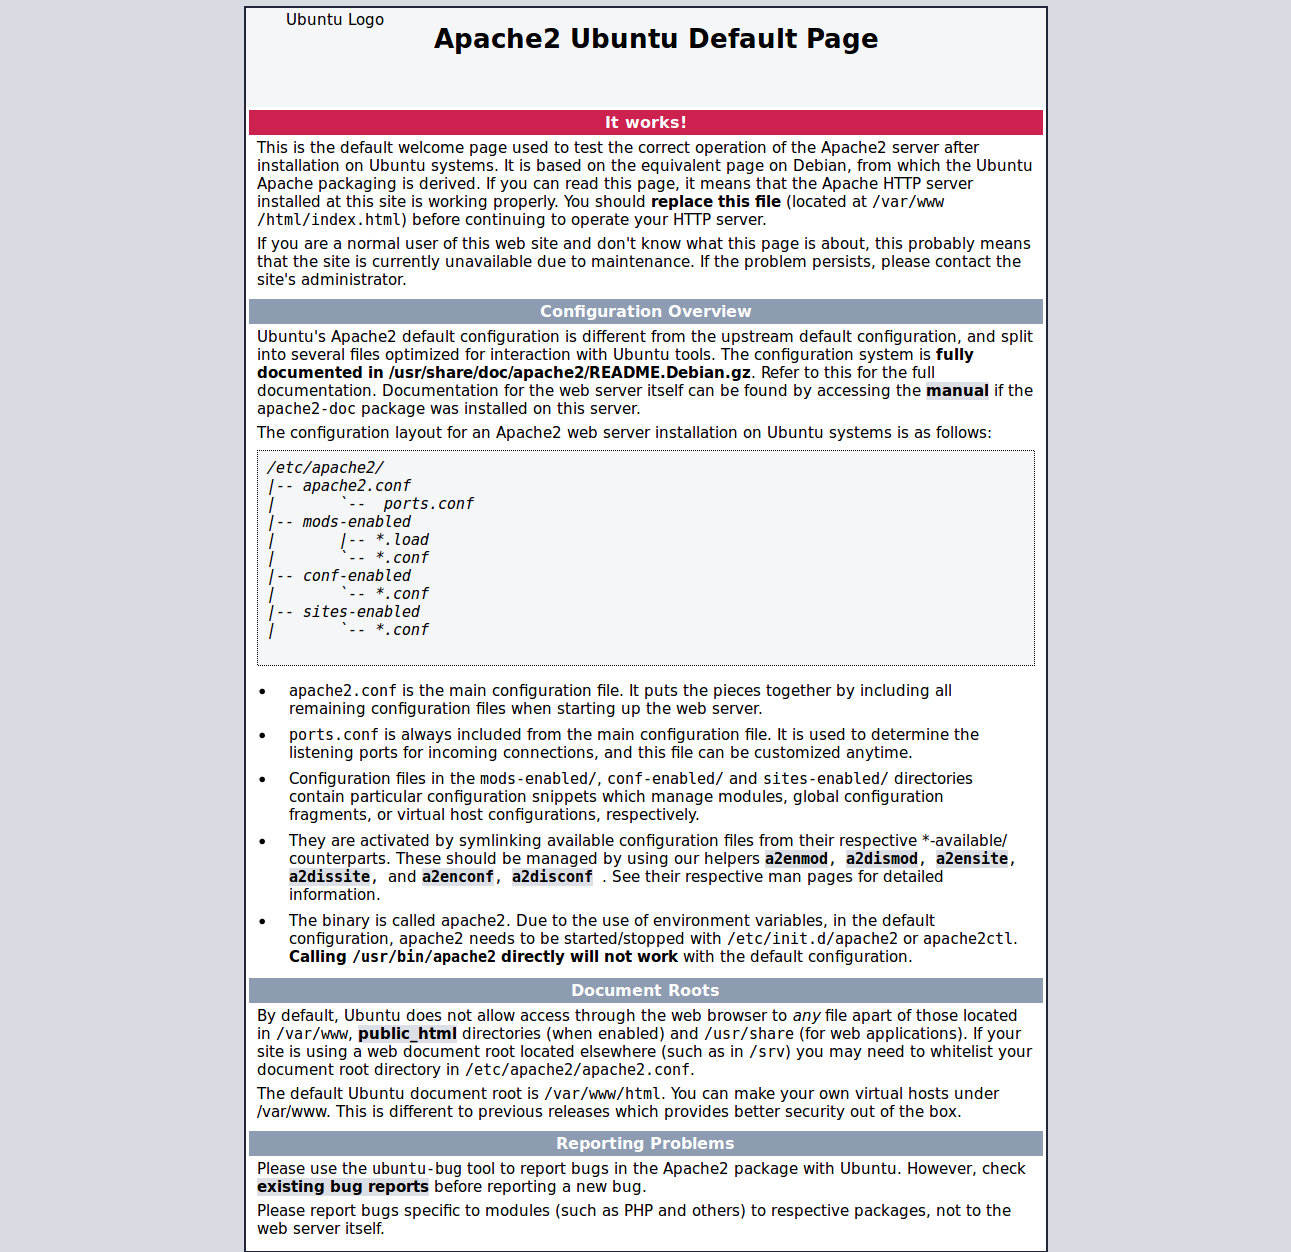
You can check if Apache is working, by the way, go to http://youripaddress on your browser. If the browser displays the following, then you have successfully installed Apache:
On Ubuntu, source code will be stored in the directory /var/www/html
Use the command:
ls /var/www/html
then will see in the html directory now contains 2 files index.html and index.nginx-debian.html.
Step 3: Install PHP
1, Install PHP
To install PHP and PHP modules for Apache on Ubuntu, use the following command:
sudo apt-get install php libapache2-mod-php php-mcrypt
To check if PHP and Apache are compatible and we will need to restart Apache with the command:
sudo service apache2 restart
Then create 1 file test.php:
sudo gedit /var/www/html/test.php
with the following content:
<?php
phpinfo();
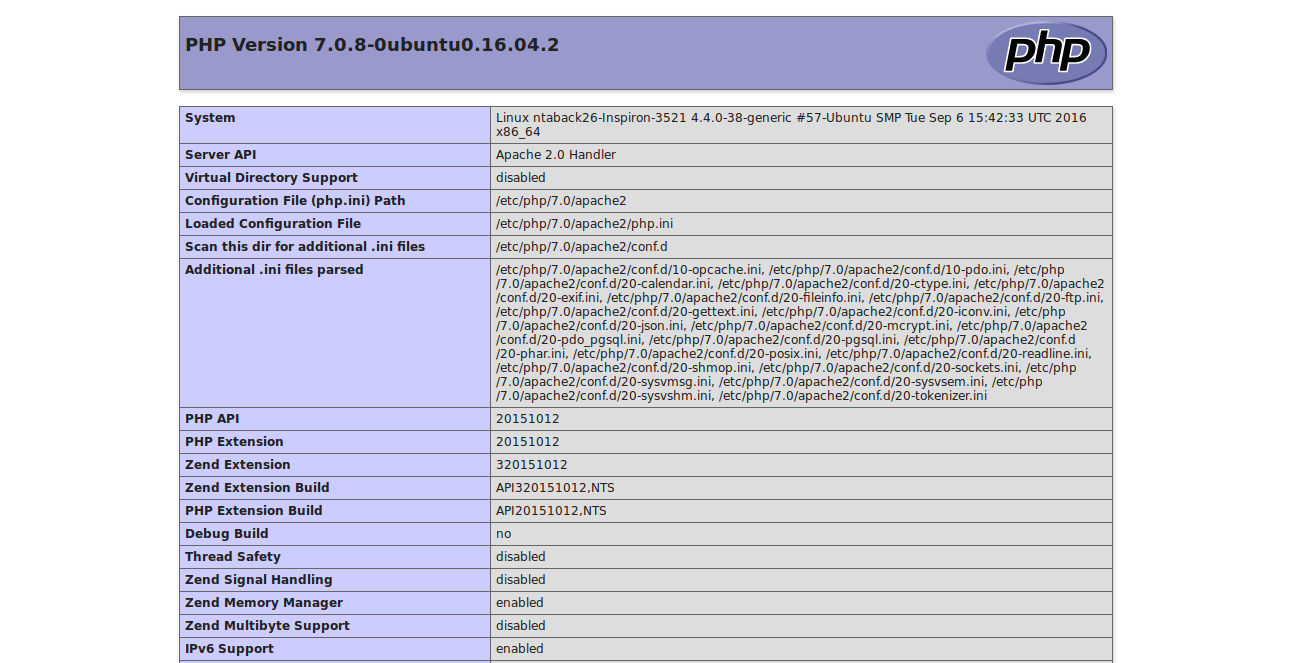
If the browser displays the following, then it is assumed that we have successfully installed PHP:
2, Install the module for PHP
Use the following command to display the list of modules for PHP:
sudo apt-cache search php-
To install any module, use the command:
sudo apt-get install module-name
Step 4: Install MySQL
1, Install MySQL
To install MySQL, use the following command:
sudo apt-get install mysql-server php-mysql
During the installation process, the system will ask you to enter the password and confirm the password for the MySQL root account.
2, Install phpMyAdmin
As a first step, use the following command to install phpMyAdmin:
sudo apt-get install phpmyadmin
The installation of phpMyAdmin takes quite a long time. During the installation process, the system will ask us to select which web server is automatically configured when running phpMyAdmin. Now you choose apache2 and click Enter.
After that, the system will need to require to create a password for phpMyAdmin, you can use the password created at the MySQL installation step.
Open the file and /etc/apache2/apache2.conf add this line to the end of the file:
Include /etc/phpmyadmin/apache.conf
Finally, restart Apache with the command:
sudo service apache2 restart
Open the browser, go to http://youripaddress, phpMyadmin will ask for your account and password, then enter root and the password you created in the installation.
OK, the installation of LAMP on Ubuntu is now complete! If you have a VPS running CentOS, you can refer to the article on how to install Lamp on CentOS.
Good luck to you and have a nice day.